
JB & JD Design · PNUADD
JB Fork Radi+
One-step jaw relation recording for digital & conventional dentures
An inter-maxillary relationship device that replaces occlusal wax rims. Capture final impressions, vertical dimension, centric relation, and esthetic references in a single visit — then align facial scan, CBCT, and IOS data with Radi+ markers.
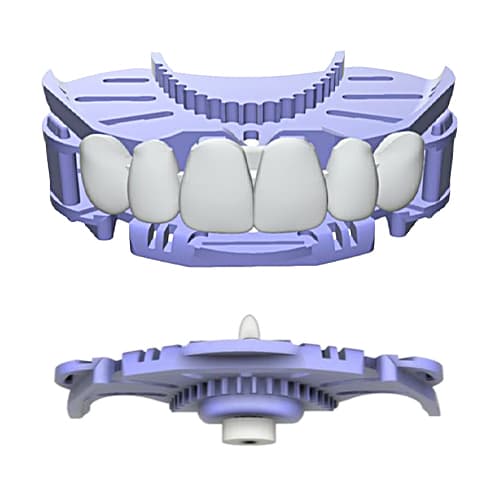
Key features
Replace wax rims and multiple record visits with a single verified jaw-relation protocol.
Impression & jaw relation in one visit
Record final impressions, vertical dimension, Gothic arch tracing, and centric relation simultaneously — reducing visits compared with separate custom trays and wax rims.
Digital & analog compatible
Works with intraoral scanners, model scanners, CBCT object scans, and conventional denture fabrication. Design in 3Shape, Exocad, or your existing CAD workflow.
JB Fork Radi+ multi-modal alignment
Radiopaque anterior markers and guide pins register facial scanner data (e.g. RAYFace), CBCT, and intraoral scans into one verified dataset for implant and full-arch cases.
POP Bow integration
When a facial scanner is unavailable, ADD POP Bow captures occlusal plane, lip line, and anterior tooth position — the same esthetic transfer philosophy as JB Tray.
Components
Each JB Fork Radi+ unit includes plates, anterior teeth, and Radi+ alignment features.
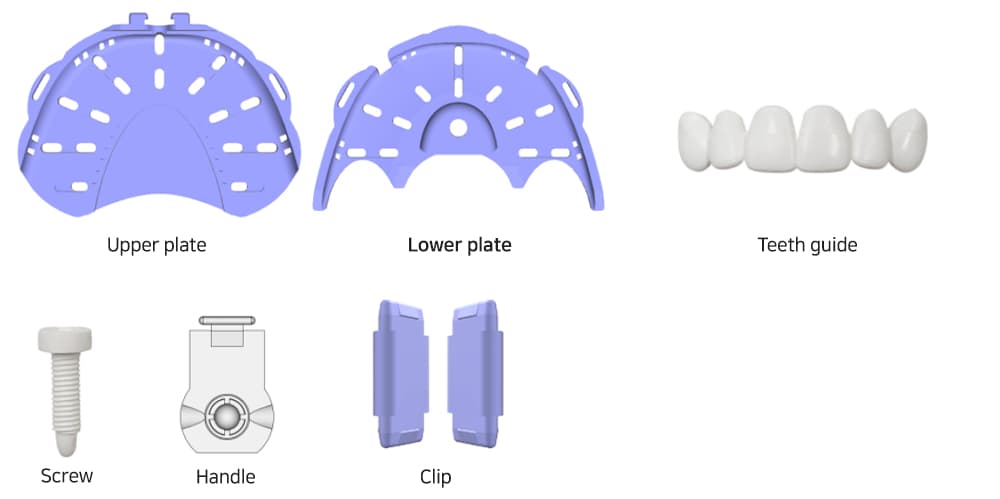
Upper & lower plates
Rigid plates for putty/VPS impression and bite registration between arches.
Anterior tooth set & screws
Six maxillary anterior teeth for midline, lip support, and incisal reference before final bite.
Radi+ markers & guide pins
Anterior markers visible on CBCT and facial scans for cross-modality registration.
Radi+ multi-modal alignment
Radiopaque markers tie facial, CBCT, and IOS datasets together for implant and full-arch digital cases.
- →Facial scan — lip line and anterior esthetics aligned to Radi+ markers
- →CBCT — radiopaque markers visible for implant planning and object scans
- →Intraoral scan — impression and bite surfaces registered to the same coordinate system
- →Lab import — merged virtual patient sent to PrintDenture for definitive fabrication
For chairside final impressions without Radi+ alignment, see the JB Tray guide.
Digital workflow
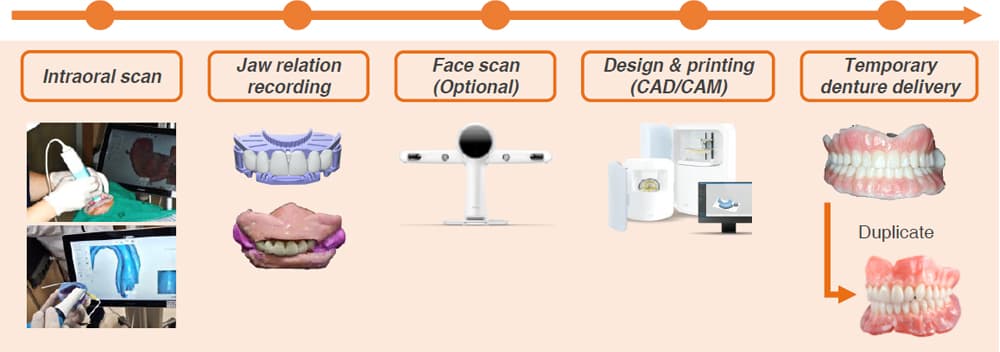
Recommended path for complete dentures and implant overdentures on PrintDenture.
- 1
Baseline scan (optional)
If using an intraoral scanner, capture pre-operative or preliminary data. Traditional final impressions are also acceptable when IOS is unavailable.
- 2
Maxillary JB Fork application
Apply tray adhesive to the maxillary plate. Assemble anterior teeth to the plate — align midline with the facial midline and position incisal edges about 1 mm below the upper lip. Load putty/VPS, insert, and verify lip support, midline, and incisal line.
- 3
Mandibular JB Fork application
Apply JB Fork to the mandible with putty and VPS using the same chairside protocol.
- 4
Vertical dimension & Gothic arch
Assemble screws between plates to establish vertical dimension. Perform Gothic arch tracing and mark the centric relation apex (a small hole at the tracing apex aids bite registration retention).
- 5
Bite registration
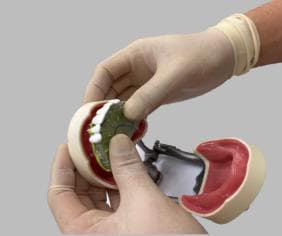
Apply VPS bite registration material between the upper and lower plates to fix the specified vertical dimension and centric relation.
Tip: Tray adhesive on the plates improves adhesion of silicone bite material.
- 6
Occlusal plane & facial reference
Capture a 3D facial scan with Radi+ markers visible, or record the occlusal plane with ADD POP Bow when a facial scanner is not available.
- 7
Scan & design
Scan impressions intraorally, on a model scanner, or as a CBCT object scan. Import aligned datasets into 3Shape or Exocad for digital denture design.
Conventional workflow
Analog denture fabrication using JB Fork records and optional POP Bow transfer.
- 1
Apply JB Fork
Seat upper and lower JB Fork plates with impression material on both arches.
- 2
Gothic arch tracing
Establish vertical dimension and record centric relation with tracing.
- 3
Bite registration
Fix VD and CR with VPS between the plates.
- 4
POP Bow (optional)
Transfer occlusal plane and anterior esthetics with ADD POP Bow for laboratory mounting.
Clinical outcomes
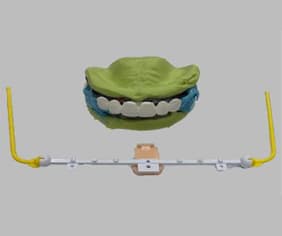
Verified jaw relation & esthetic reference in one session
Aligned digital datasets → definitive denture without try-in
Instructional videos
Official demonstrations — digital denture workflow and JB Fork Radi+ with CBCT.
Digital complete denture with JB Fork
English walkthrough — from JB Fork records to digital denture fabrication.
JB Fork Radi+ & CBCT
Guided surgery diagnosis using JB Fork Radi+ markers with CBCT imaging.
Ready to use JB Fork Radi+ with PrintDenture?
Order kits from our shop, capture aligned scan sets, then submit cases. Verify esthetics and occlusion with the printed try-in before final delivery.
PNUADD Co., Ltd. (JB & JD Design). Clinical content adapted from PNUADD distributor workflows and official PNU ADD instructional videos. JB Fork Radi+ is a product of PNUADD. PrintDenture is an independent California lab — order kits through PrintDenture or send aligned scan sets after chairside records. See also the JB Tray guide.